
Are you dealing with a print that comes out surprisingly different than what you expected, despite having ruled out more typical problems like improper slicing profile or poor print bed adhesion? It’s possible that your STL file is to blame. Sometimes a model’s “shells” contain errors that conflict with the intended geometry of the model. Cura automatically compensates for some smaller errors, but larger errors may require alternative methods in order to print correctly.
If you’re not sure what symptoms to look for or what tools to use, identifying these model inconsistencies can seem like searching for a needle in a haystack. To alleviate the search, this 3D printing STL file help tutorial shows you a few steps to help identify and correct some problems in your STL file.
Identifying Problems with STL Files
Step 1. Open and Slice STL in Cura LulzBot Edition
Bring up the problematic STL on Cura LulzBot Edition’s virtual print bed, and then select the material and the desired profile. Cura will automatically begin slicing the model. Below are two example models to help illustrate common problems with STL files.

Example A
Example B
Step 2. Previewing your 3D Print in Layers View
Select the drop-down toggle shaped like an eye on the left hand side of the screen. This toggle controls your view of the model, and the default is “Solid.” Select the 'Layers” option instead, as this will give you a preview of how each layer will print.

Slide the circles from top to bottom to show only the layers you want to see. As you scroll down through the model, look for inconsistencies. If something stands out that that doesn’t look how the model was designed, it’s possible that there are invisible shell errors that are complicating the slicing process.
Example A) Manifold Error: A 3D model's shell is said to be 'manifold' when it can theoretically hold water. If there are any holes in the shell, the object is said to be 'non-manifold,' and this may cause Cura to slice the model inaccurately. While some manifold errors will require you to use modeling software such as Blender to fix the holes, Slic3r’s manifold check and auto-repair tool can be used as an alternate method (outlined in Step 3).
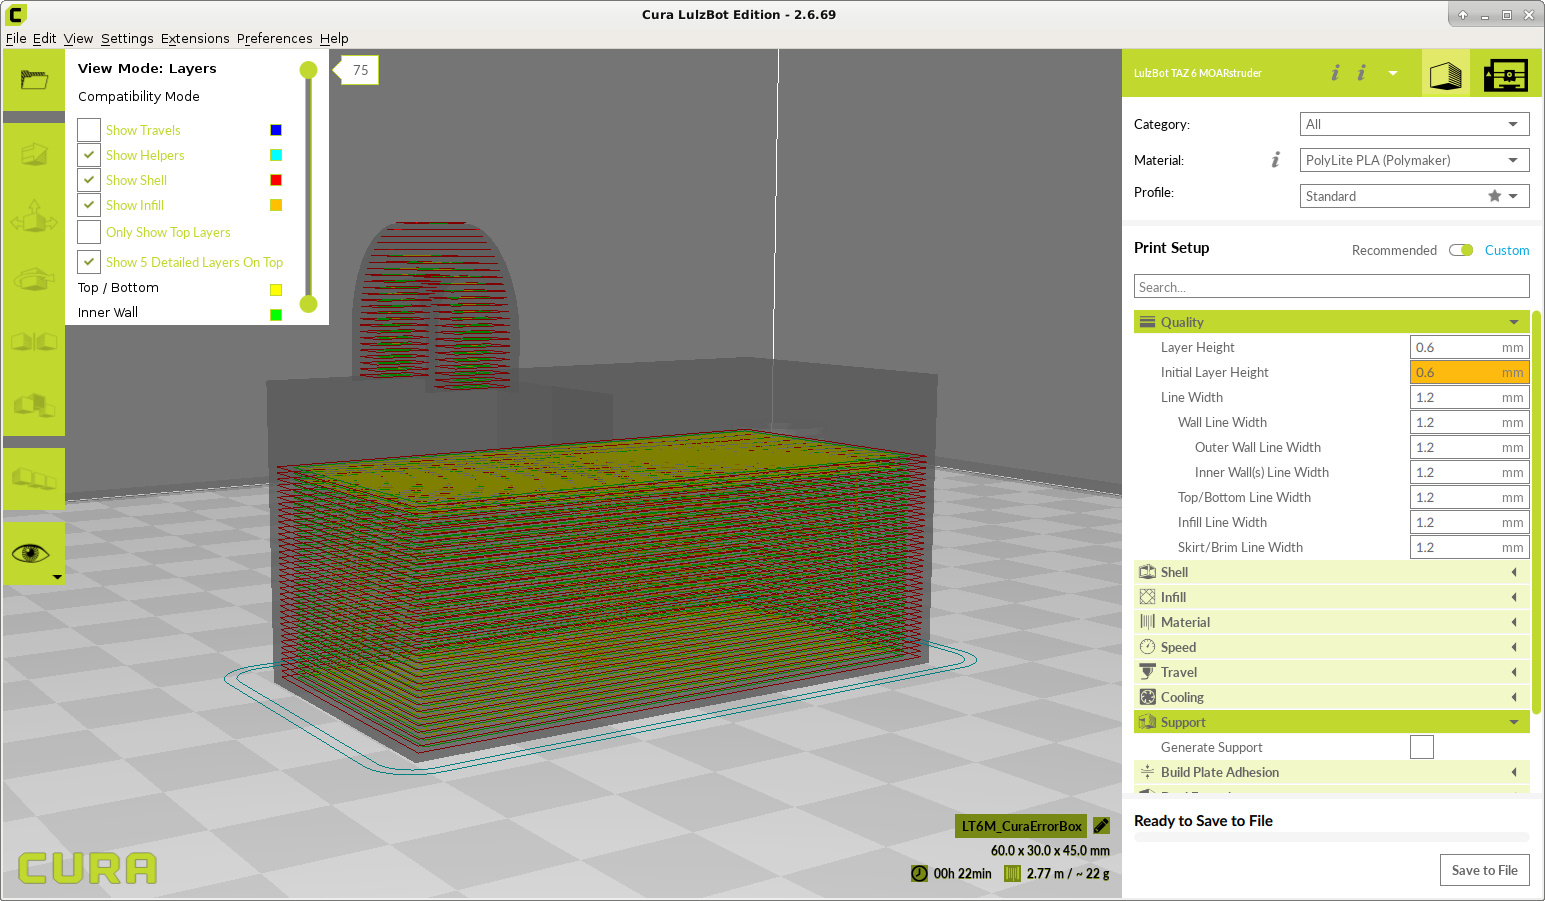
As you can see in this example, the model has been sliced inaccurately from a manifold error. As a result, the middle section of the model is being ignored and will not print at all, appearing invisible in the Layers view.
Example B) Reversed Normals: Every plane composing each shell of a 3D model has an intended inside and an outside, called a 'normal.' When a plane’s orientation is reversed in relation to those around it, it’s referred to as a 'reversed normal.' This becomes an issue when it occurs unintentionally within a model, and ranges from a tiny section of a shell, to intersecting shells of a complex multi-shell model, to an entire model with a single shell that is all reversed.

Similar to the manifold error in Example A, this model has been sliced inaccurately. but this time it's due to reversed normals in the cube on top of the cylinder. In Layers view the cube appears invisible and intersects the cylinder below.
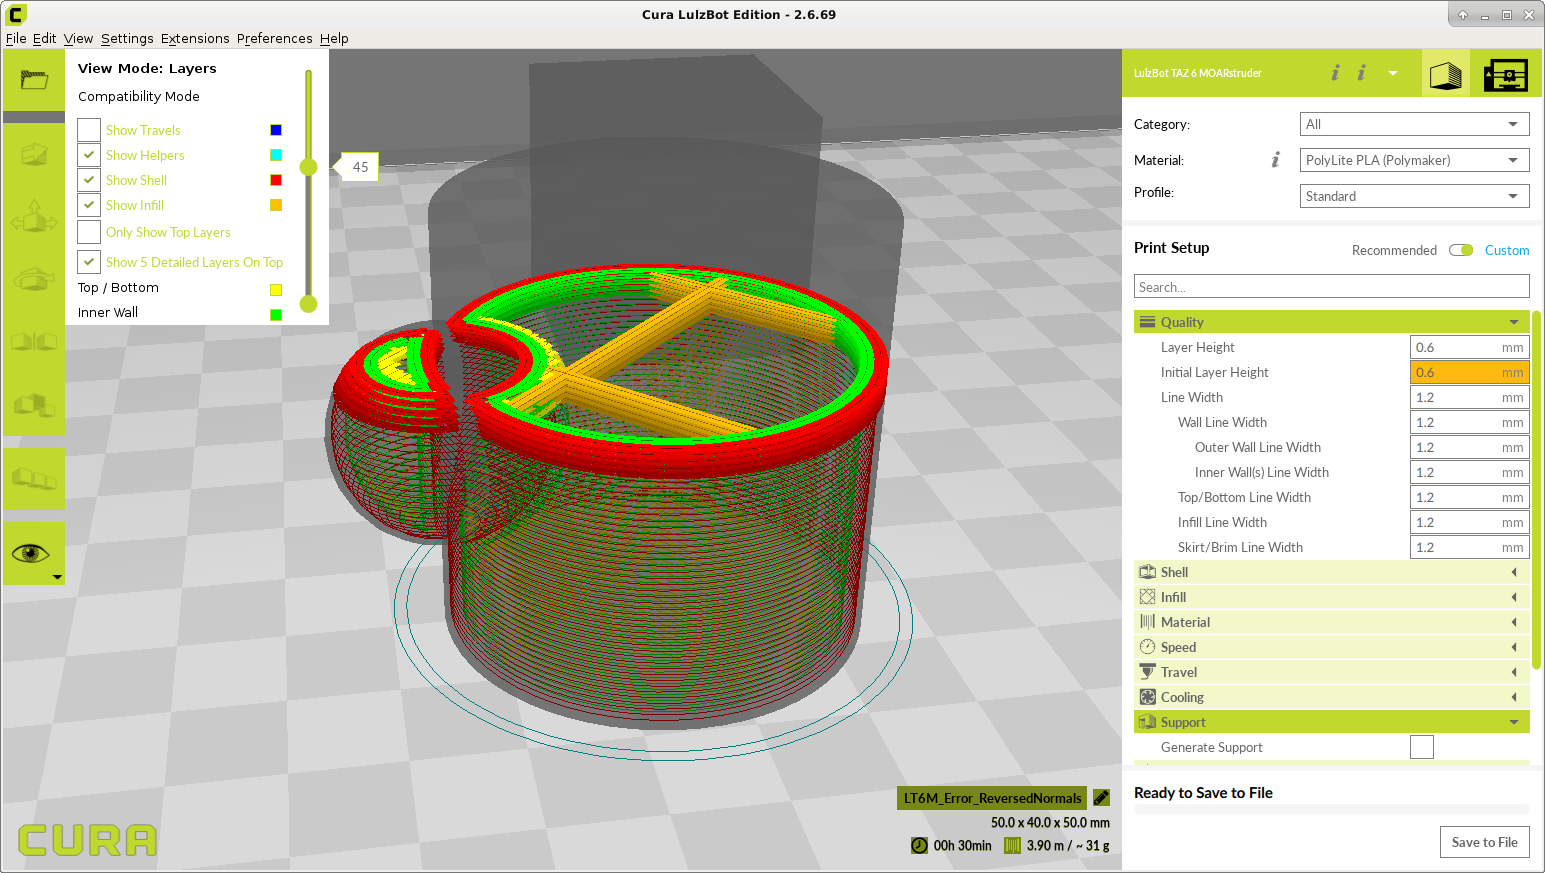
A second example of a reversed normal in the same model is shown here. Reversed normals in the sphere on the side of the cylinder have caused inaccurate slicing that creates an unintended void.
Fixing Problems with STL Files
Step 1. Open STL in Slic3r
Slic3r is a 3D model slicing software similar to Cura LulzBot Edition. Slic3r has a more robust manifold error correction than Cura.
Download and Install Slic3r. Start Slic3r and open the STL you want to check by selecting “Add” in the top left corner.

Step 2. Check for Manifold Errors
With your model loaded in Slic3r, take notice of the information in the bottom right of the screen. Next to “Manifold,” the exclamation point in the triangle warns you that there are errors in the STL making the model non-manifold, and then displays how many errors there are. This particular STL has 1 shell with 4 manifold errors still needing to be corrected.

Step 3. Attempt to Repair STL
On the top left of Slic3r, click on “File.” In the drop down menu, select the button that says “Repair STL file…,” then select the STL you want repaired, and choose a file name. This is fairly effective as an algorithmic repair method, but it's far from perfect, and sometimes the file is too damaged to fix without redesigning in modeling software.

To confirm in Slic3r the repairs have been made and the model is now manifold, right click and delete the model on Slic3r's virtual print bed. Then select “Add” from the top left and choose the file you have just repaired. Select the model on the virtual print bed and verify there is a “Yes” next to 'Manifold.'

Step 4. Confirm Repairs in Cura
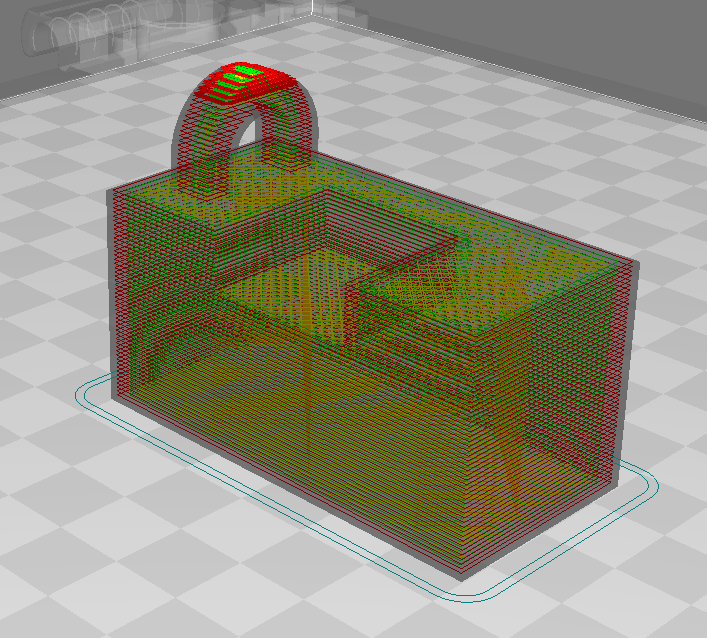
Open Cura, and visually inspect the repairs by opening the STL file and selecting Layer view, as outlined in Steps 1 and 2. As shown below, the section of Example A that was invisible before because of the manifold error is now repaired, resliced, and visible.
If your model is manifold but still exhibiting slicing errors, reversed normals are likely to blame. Unfortunately, this is not as simple to fix. Refer to the help section of your 3d modeling software of choice for information on reversing normals.
Step 5. Ready to Print
Once you have repaired the portions causing errors and verified your STL file, you are good to start printing!
Did these tips help fix your model?
Let us know by sharing your improved design and print results on social media!